The ODBC standard was developed in the early 1990’s to allow a software developer to use a single interface to access mutltiple data sources. Microsoft Access is a very versatile application since it can import or link to a variety of ODBC data sources.
Today’s article will cover how to define a new ODBC connection. I will be using the [WILD LIFE] database that was created in a earlier article.
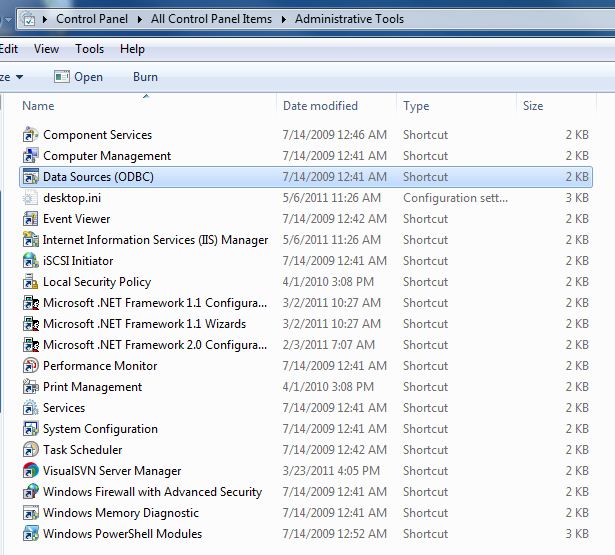
First step is to open to the administrator tools on the windows operating system. You can find this group under your control panel shortcut.
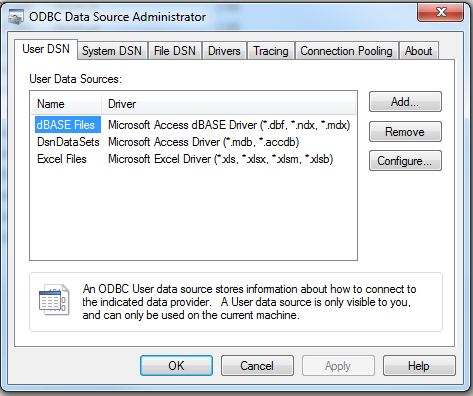
Second step is to launch the ODBC administrator program so that a system wide DNS can be defined.
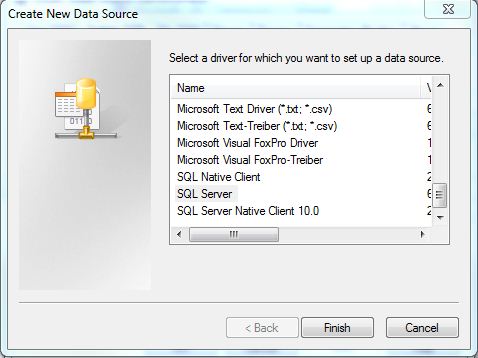
Third step is to lauch the ODBC wizard by clicking the add button. Please select the SQL Server driver as the source of the data.
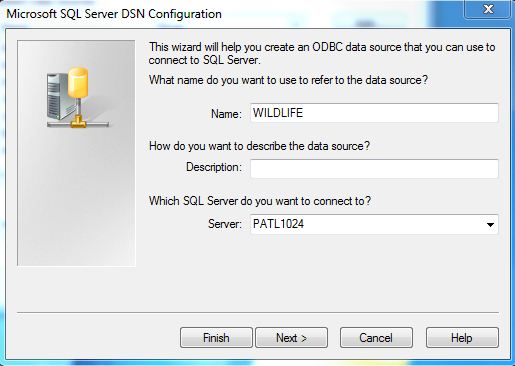
Fourth step is to to name the new connection and select the computer name of the SQL Server engine.
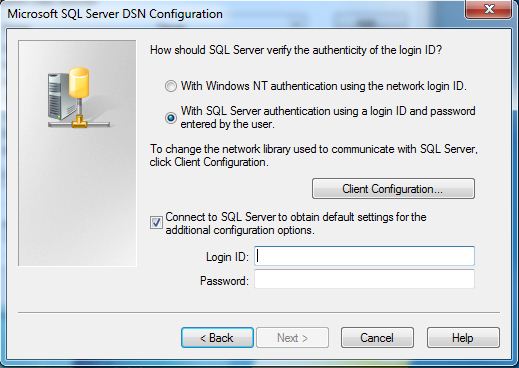
Fifth step is to choose either integerated (MS Windows) or standard (SQL Server) security.
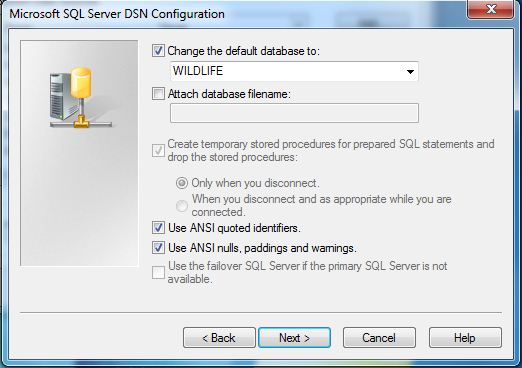
Sixth step is to select the SQL Server database from the list of databases.
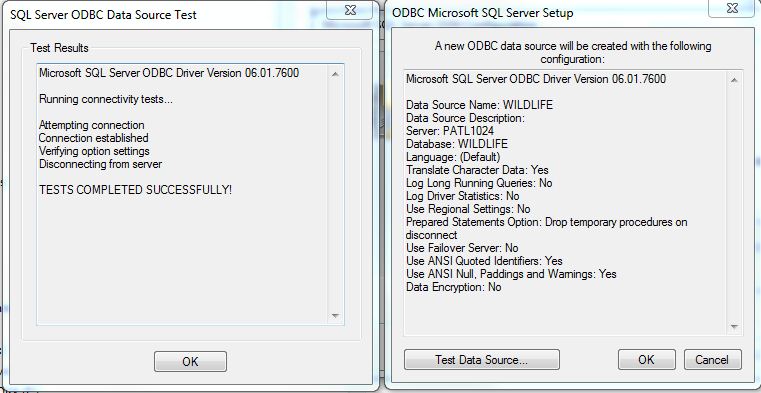
Seventh step is to test the newly created connection. This is the most important step of all.
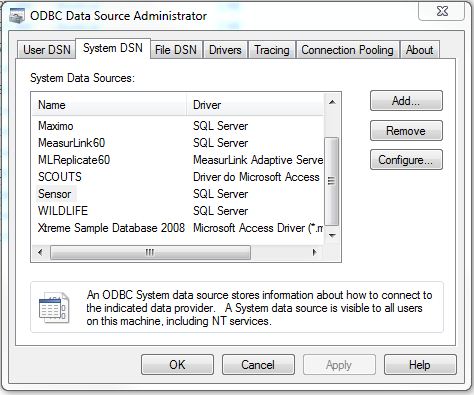
Last but not least, the newly created connection should appear under the list of System DSN.
As you can see, the task of creating a new ODBC connection requires the correct ODBC driver to be installed and SQL Server login privileges be granted.
Next time, I am going to connect to the database via a linked server in MS ACCESS. This will be setting stage for using a LOGON TRIGGER to prevent unwanted applications, such as MS Access, from connecting to the server.
