I was recently approached by my manager to free up a Direct Attached Storage (DAS) device from a test server so that it could be leveraged in a higher environment.
To my amazement, both the system databases and binary executables were installed on the drive I needed to move.
Today, we are going to concentrate on moving master and resource system databases. Here is a article from MSDN to use as reference.
Moving the master database
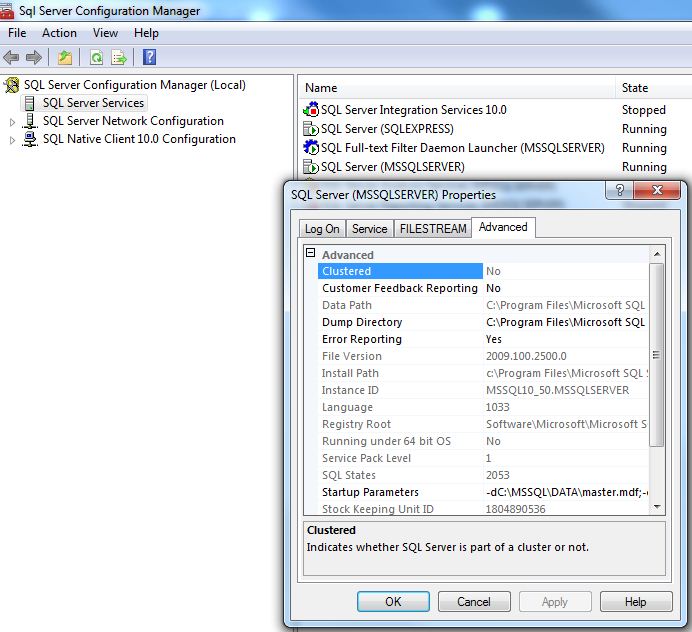
1 – Open the SQL Server configuration manager.
2 – Select the SQL Server Services node.
3 – Right click SQL Server (
4 – Select properties, advanced table.
5 – Copy the startup parameters to notepad.
6 – Change the location of the master data file, master log file and error logs.
7 – Right click SQL Server and stop the service.
8 – Move the master data and log files.
9 – Right click SQL Server and stop the service.
Properties Page – Screen Shot
The resource database was introduced in SQL Server 2005 so that upgrading from one version of the engine to another was easier. Before this change, the system views and tables had to be modified in each database when upgrading. It is not surprising that the location of this database has changed from 2005 to 2008 (R2) since the product is maturing. Initially, the resource database was treated as a system database that could be moved with master. In later versions, the file is located in the BINN directory and should not be moved.
Moving the resource database (SQL2005)
1 – Stop the database engine from command line.
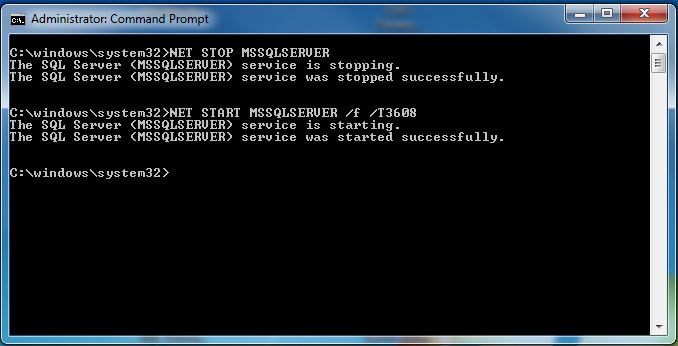
2 – Start database engine in master database only mode.
3 – Run the SQLCMD to update the location of the resource database.
4 – Copy the resource database to the new location.
5 – Make sure the resource database is in read only mode.
6 – Stop the database engine, exit master datbase only mode.
7 – Restart the engine in normal mode.
8 – Verify the change by selecting fronm sysem catalog views.
This snippet has the above steps in code to be executed from the command line.
Master Only Mode – Screen Shot
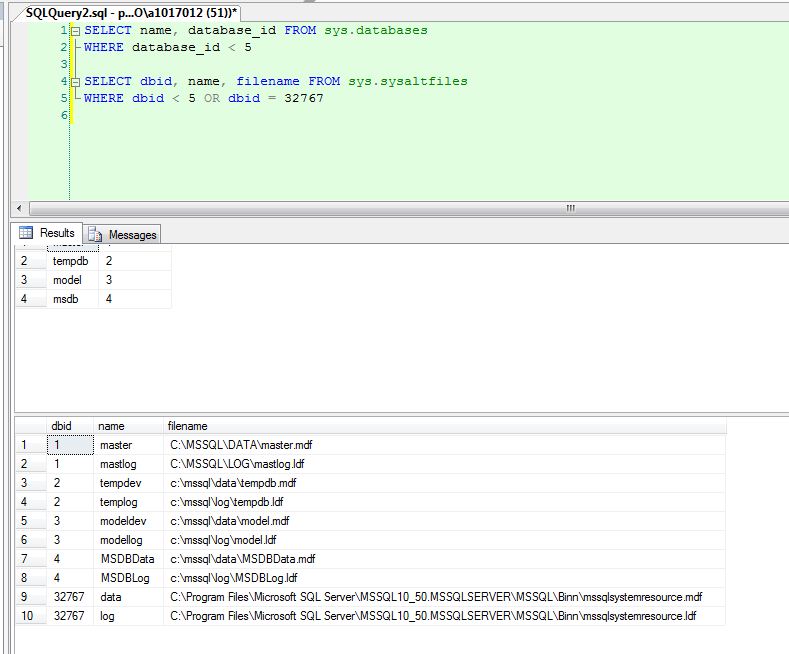
In in SQL Server 2008 or later, the location of the resource database can be found by querying sys.sysaltfiles.
System Databases – Screen Shot
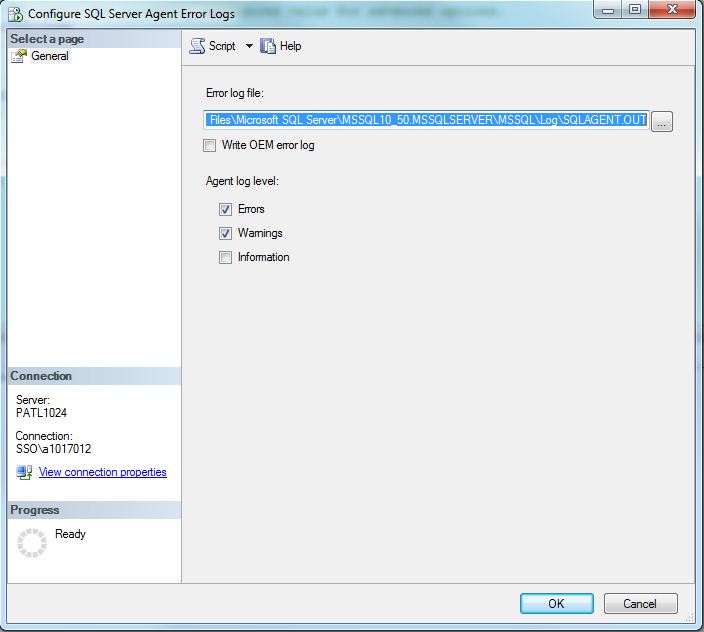
Changing SQL Server Agent Log Path
1 – From SQL Server Management Studio, in object explorer, expand SQL Server Agent.
2 – Right-click error logs and click configure.
3 – In the Configure SQL Server Agent error logs dialog box, specify the new location of the SQLAGENT.OUT file.
Agent Log Files – Screen Shot
To recap, use the SQL Server Configuration manager to specify a new location for the master database. In SQL Server 2005, the resource database can be moved. In later versions, it is considered part of the binary install. Last but not least, you can change the SQL agent log path. Like any DBA task, make sure you have good and recent backups before playing with the system databases. Next time, I will talk about moving the SQL Server install directory by using SynchTool.


