![]() Most of the articles that I presented so far for database development have been centered around the exact Microsoft T-SQL syntax to perform a certain operation. At the University of Rhode Island, I learnt how to program in Pascal before typing in my first ANSI SQL statement. In short, I will always be some type of developer in my heart.
Most of the articles that I presented so far for database development have been centered around the exact Microsoft T-SQL syntax to perform a certain operation. At the University of Rhode Island, I learnt how to program in Pascal before typing in my first ANSI SQL statement. In short, I will always be some type of developer in my heart.
However, many people do not come from a computer science and math background. The SQL Server Management Studio (SSMS) has menus and dialog boxes to achieve many of the same results.
Today, I am going to continue the series of articles that will recreate the [AUTOS] sample database while demonstrating how common T-SQL tasks in my script can be done with SSMS.
I want to explore how to ADD, ALTER and DROP check constraints or default definitions using the SSMS graphical interface. Please see section 1I in the code for the table and column definitions.
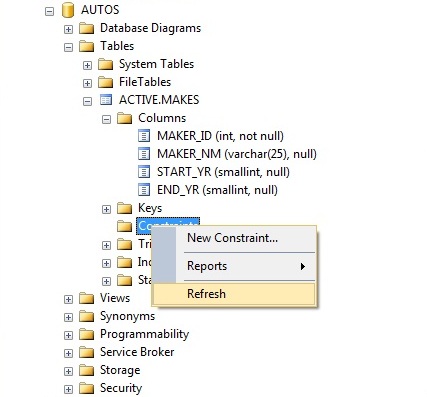
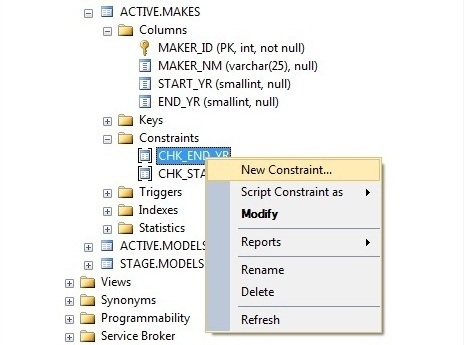
My example will assume that the [ACTIVE].[MAKES] table has been created without any indexes or constraints. To create the required check constraints, find the table in the object explorer and drill down to the constraints node. Right click and select new constraint.
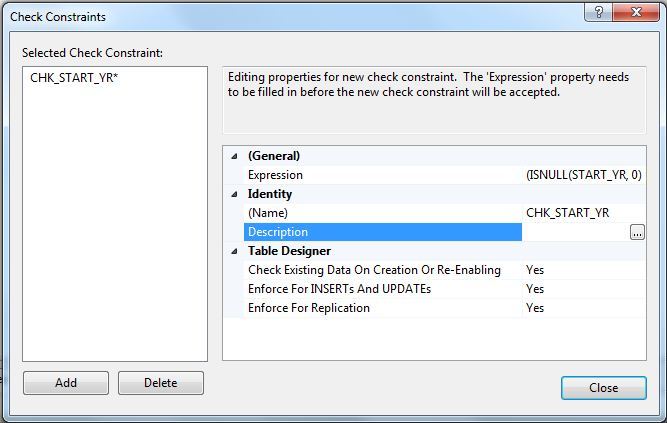
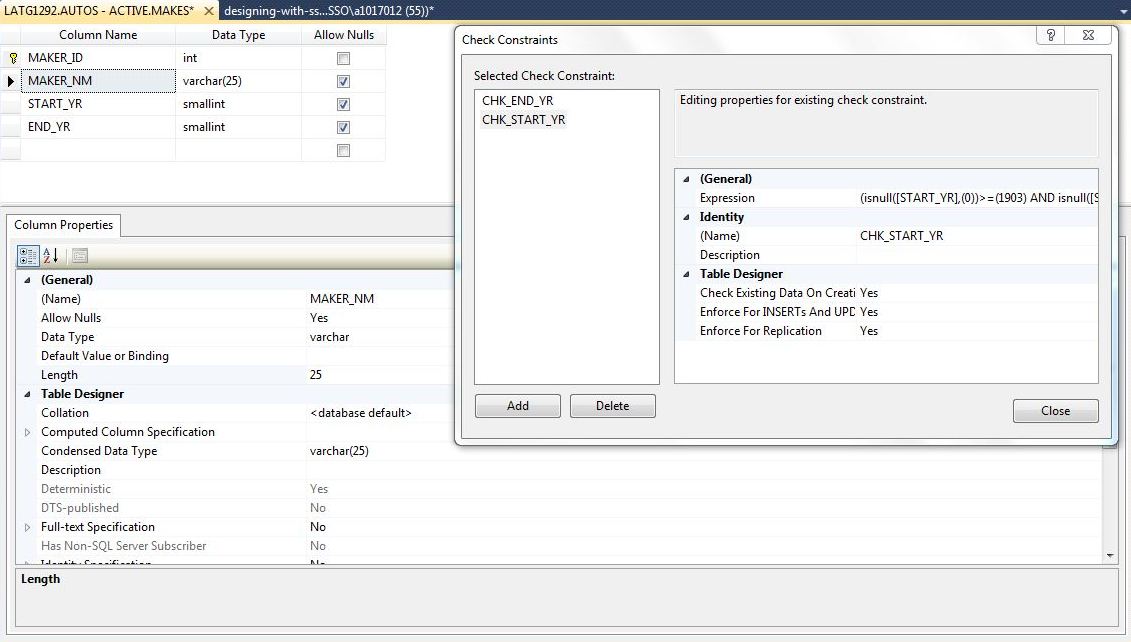
This action will bring up the table designer in the background and the check constraint dialog box in the foreground.
Enter the information for the first constraint on the [START_YR] column as shown below.
Enter the information for the second constraint on the [END_YR] column as shown below.
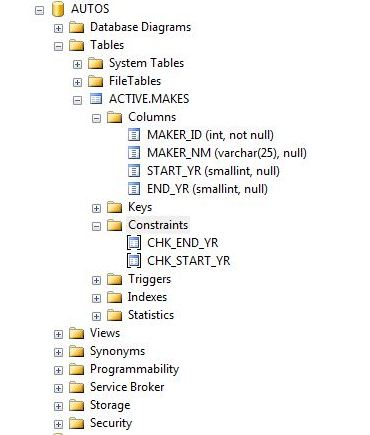
Click the save all toolbar button to commit the changes. Close the check constraint dialog box and the table designer. If everything was done correctly, your refreshed object explorer window should show the two new constraints.
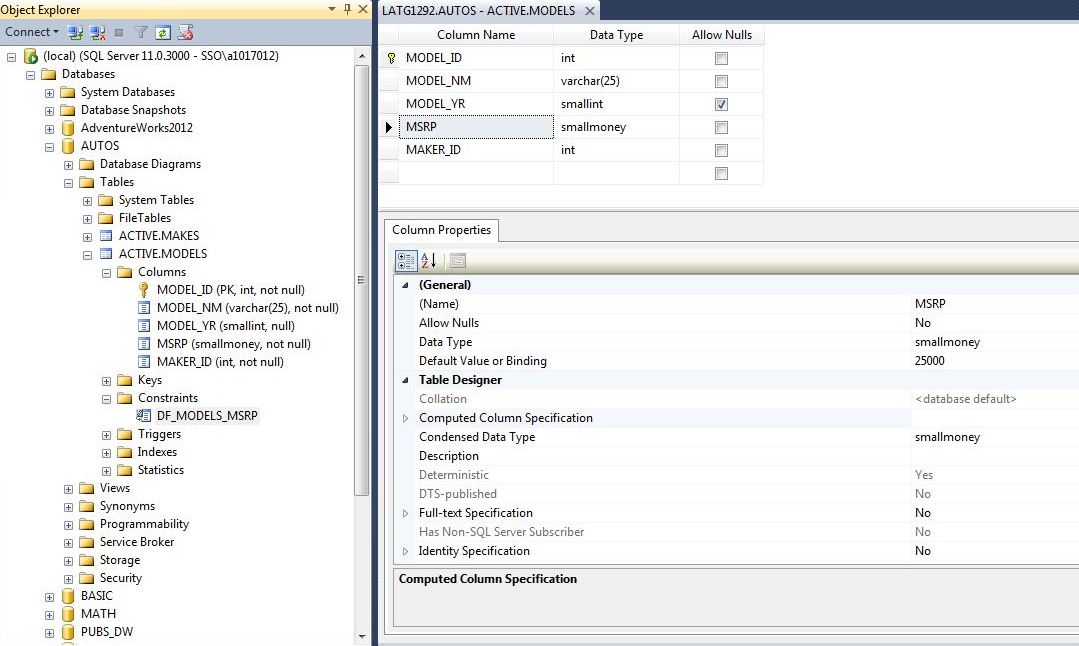
A default definition can be easily added by opening the table in the designer. This can be accomplished by selecting the table name in the object explorer, right clicking and selecting the design sub-menu option.
Find the column properties for the [MSRP] column and enter a default value of 25000. Click the save button to create the default constraint.
The constraint will have a default naming convention of table name followed by column name. If you do not like this notation, go into the constraint node in SSMS. Right click and select rename the object. Change the name to your liking.
Altering a check constraint or default definition is a little easier. Enter the table designer again for the [ACTIVE].[MAKES] table. Find the column that you want to change the default constraint definition. Change the value of the expression. Save the result.
The same action can be done with check constraints. Find the check constraints sub-menu under table designer menu. Again, change the expression to your liking. Click the save all toolbar button to commit the changes.
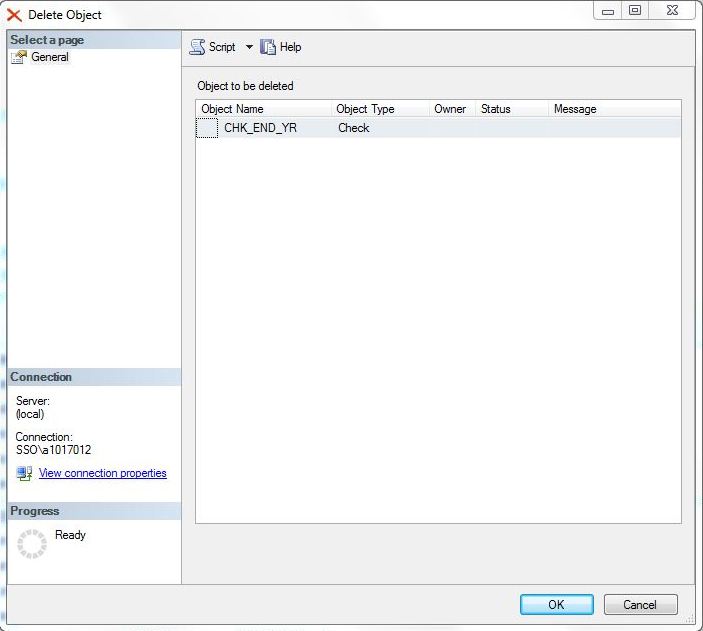
We can remove the check constraints or default definitions by deleting them. Select the [CHK_END_YR] constraint in the object explorer. Right click and select the delete option.
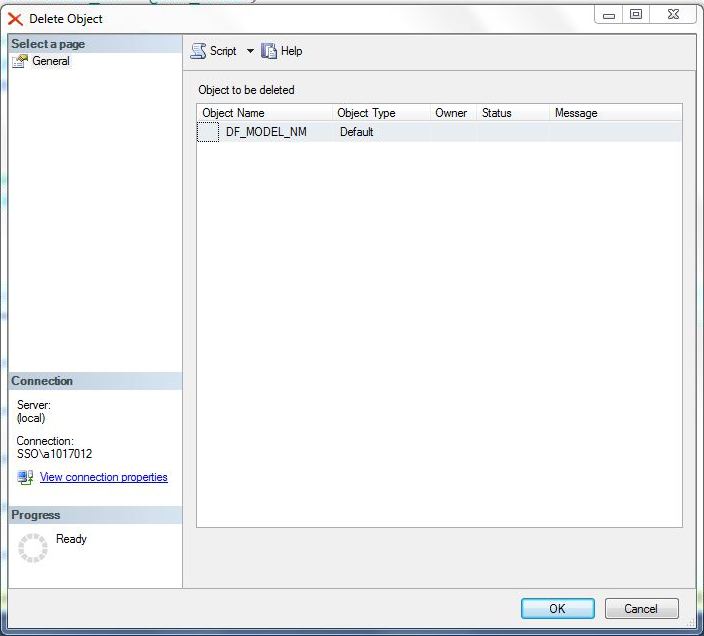
This will bring up the delete object dialog box. Confirm that this is the object that you want to remove. Click the OKAY button to remove the object or the CANCEL button to abandon the action.
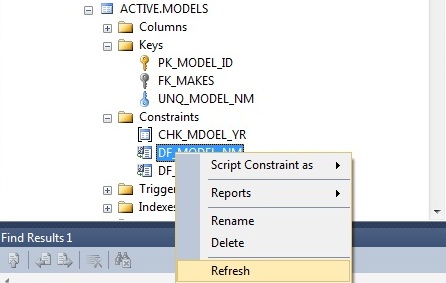
Select the [DF_MODEL_NM] constraint in the object explorer. Right click and select the delete option.
This will bring up the delete object dialog box. Confirm that this is the object that you want to remove. Click the OKAY button to remove the object or the CANCEL button to abandon the action.
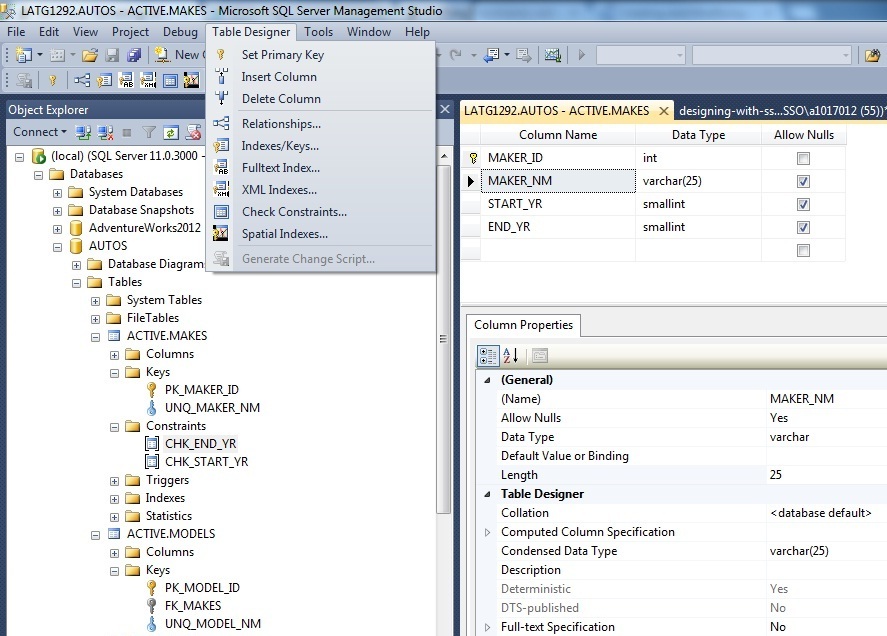
In summary, the table designer is capable of ADDING, ALTERING, or DROPPING table columns, constraints, indexes, or relationships. As you can see below, there are many objects that can be defined with the table designer.
Today, we focused on our talk on check and default constraints. Tomorrow, we are going to start discussing indexes.
