I recently presented at SQL Saturday 184 in North Haven and was able to listen to Grant Fritchey’s present “Query Tuning in the Clouds”. What I got out of the presentation was the sense all your tuning skills could be used to optimize a Windows Azure SQL database.
I knew Windows Azure SQL Databases have been around for a couple of years but never had the time or need to research them. With a possible data center consolidation in the future, I was wondering if my company could leverage a Windows Azure SQL Databases to reduce the total cost of ownership for certain applications?
I am going to write a handful of articles that will investigate what features are missing in the cloud version of server software and what benefits like geo redundant storage that can protect your business from downtime.
Lets get started by creating a Windows Azure account. I am fortunate that my company purchases a Visual Studio Ultimate subscription for my use. With this subscription comes the MSDN benefits of up to $6500 in free Azure computing power.
Log into the Azure portal using your Windows Live ID. I am assuming the MSDN subscription is linked to this email address.
You will need to have a company credit card handy to validate your identity and to charge if you go over the monthly usage limit. Hint, do not touch the spending limit since it is set to $0. The image below shows my account after I activated my Azure account.
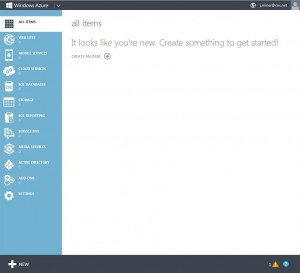
If we click the portal icon on the web page we will be redirected to the Windows Azure Dashboard.
Right now, we have no SQL Server database defined. Find the SQL databases icon and click the create new database arrow.
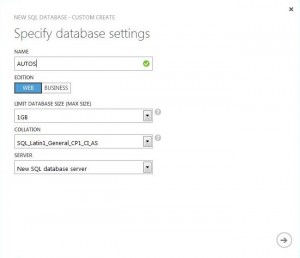
This action will bring up the new database popup window. I will be using the AUTOS database sample TSQL script during these discussions. For now, enter “AUTOS” as the database name and the defaults as all other entries. Click the right arrow to continue.
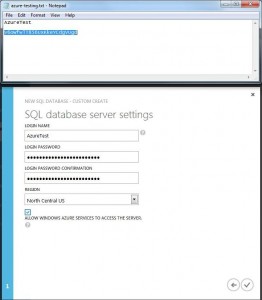
The next task is to enter in an account name and password to associate with your new Windows Azure SQL Server. I chose “AzureTest” as my user name. The password is in the notepad above. This could have been anything instead. There are a few reserved names that can not be used. I decided that North Central America was good enough location for my server. Keep track of this password since you will need it.
Once the Azure SQL Server is created, you will be supplied with the name of your cloud database server such as “npx8eftmd0.database.windows.net”. We will be using the cloud server name when we try to manage our database from SQL Server Management Studio next time.
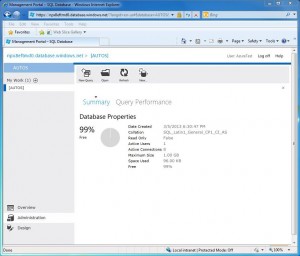
If you click the manage database icon at the bottom of the Azure Dashboard, a popup window that uses Silver Light technology will come up. This window is where you can manage the database objects. We will talk more about this window in a future blog.
In summary, it took only a database name, administrator name and a few clicks to create a Windows Azure SQL database. This is a lot quicker than building a SQL Server installation on new hardware from scratch.
So far, this product is very easy to setup.


