Most of the articles that I presented so far for database development have been centered around the exact Microsoft T-SQL syntax to perform a certain operation. At the University of Rhode Island, I learnt how to program in Pascal before typing in my first ANSI SQL statement. In short, I will always be some type of developer in my heart.
However, many people do not come from a computer science and math background. The SQL Server Management Studio (SSMS) has menus and dialog boxes to achieve many of the same results.
Today, I am going to continue the series of articles that will recreate the [AUTOS] sample database while demonstrating how common T-SQL tasks in my script can be done with SSMS. I will be going over section 1K in the sample code with a little literary lead way to go off topic when necessary to demonstrate my ideas.
I want to explore how the CREATE VIEW, ALTER VIEW and DROP VIEW statements can be executed within the SSMS graphical interface.
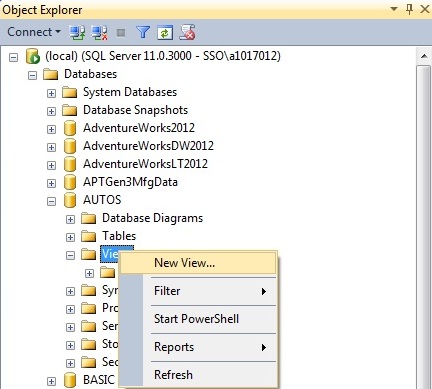
The first step in creating a view involves finding the views node under the [AUTOS] database in the SSMS object explorer. Right click and select new view as seen below.
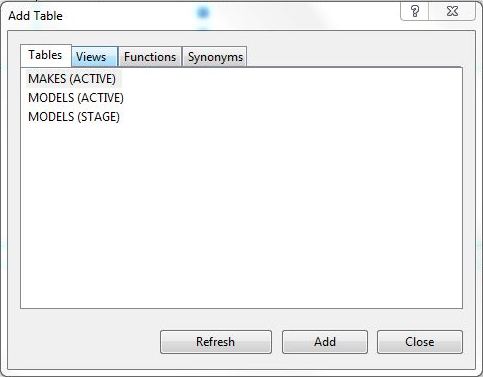
The second step is to choose both the [MAKES] and [MODELS] tables from the [ACTIVE] schema. These two tables are the basis of our view.
Instead of tables, we could choose any item from the list of valid objects: TABLES, VIEWS, FUNCTIONS or SYNONYMS.
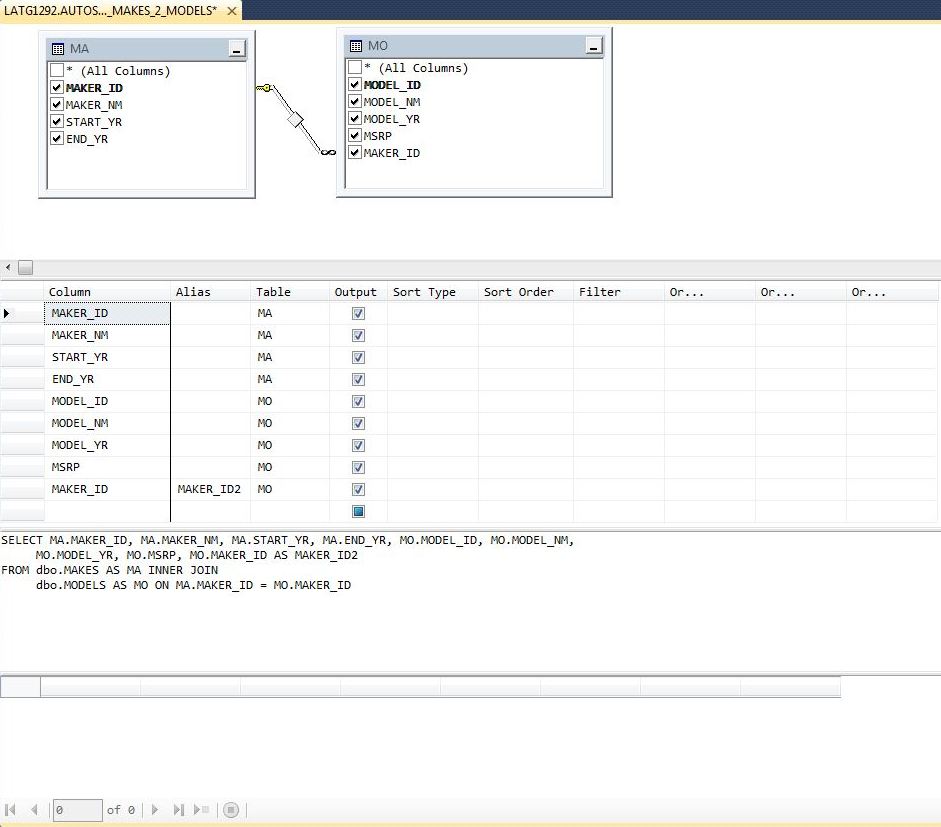
The third step is to define relationships, columns, aliases, calculations, filters and/or sorting to define the view in the designer. Because the [MAKER_ID] is common to both tables, it already has a inner join defined between the tables.
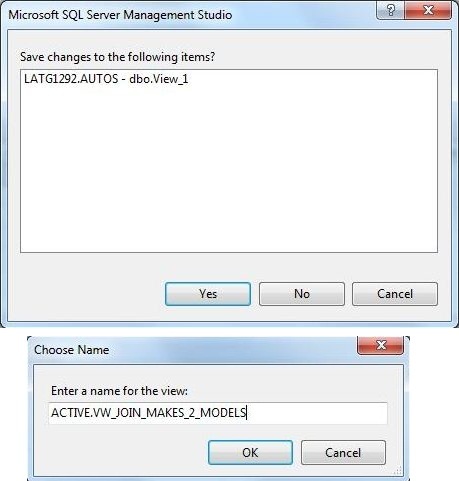
The fourth step is to close the view designer. This will prompt you to save your work. Save it as [ACTIVE].[VW_JOIN_MAKES_2_MODELS].
You have created your first view using SSMS ~ CREATE VIEW.
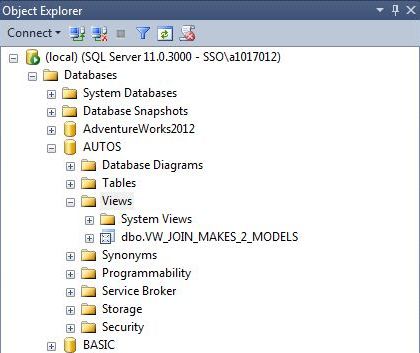
The view now shows up in the object explorer as seen below.
To edit the view, right click and choose edit. Upon saving any changes, you would have altered your view using SSMS ~ ALTER VIEW.
To drop the view, right click and choose delete. Upon okaying the delete, you would have dropped your view using SSMS ~ DROP VIEW. I will leave these simple tests for you to perform.
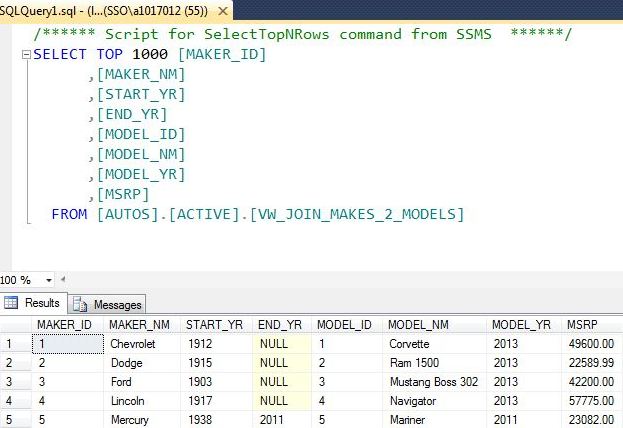
Last but not least, to select from the view, right click and choose select top 1000 rows.
To recap, we can CREATE, ALTER and DROP views using the Graphical dialog boxes in the SQL Server Management Studio (SSMS) application. Next time I want to talk about inserting, updating and deleting rows using SSMS.
