Today, I am going to build upon the prior ODBC Connection article by showing you how to create a LINKED TABLE in MS ACCESS. I am assuming that you have created a blank MS ACCESS 2007 database named [WILDLIFE.accdb]. I will be using the [WILD LIFE] SQL Server database that was created in a earlier article as the source of our information.
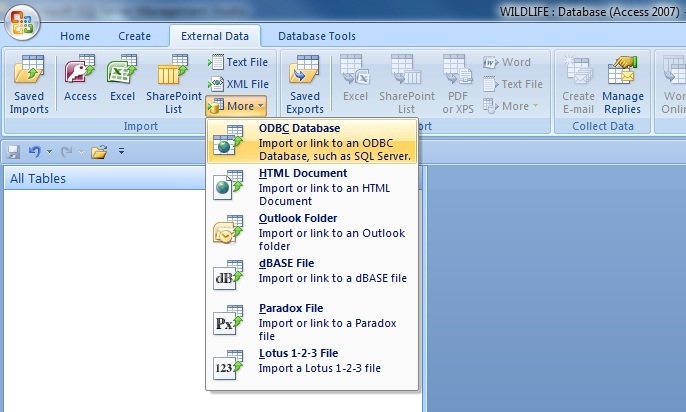
First step is to select the external data, more, ODBC database option from the menu. This launches the wizard which walks you thru creating a LINKED TABLE.
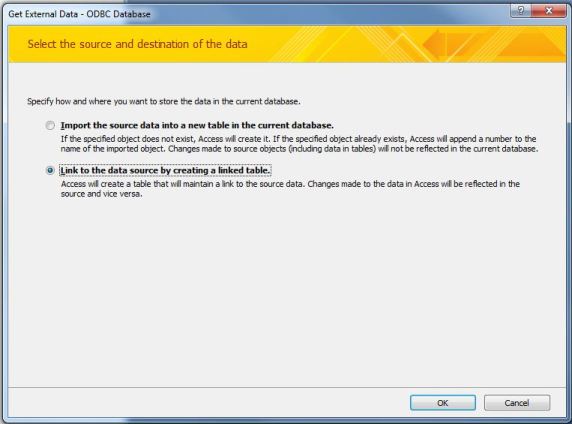
Second step is to decide wether to import or link the data. In our case, we are going to choose link. Be careful when importing large tables. This can be very time consuming take both Disk, CPU and Network resources.
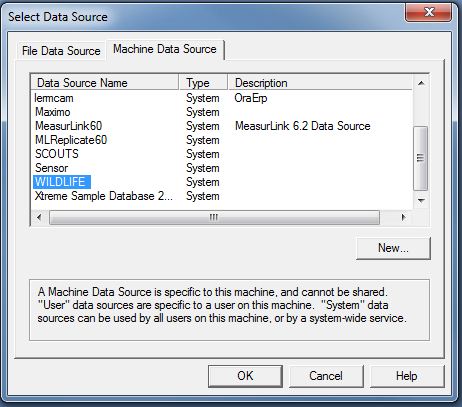
Third step is to select the ODBC connection we created for the SQL Server database.
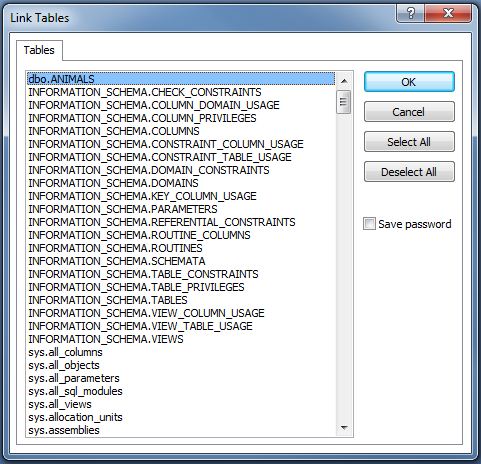
Fourth step is to choose that table that we want to link in. In our case, we are going to choose [ANIMALS].
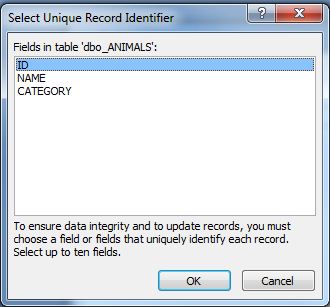
Fifth step is to choose an combination of fields that uniquely defines the table. This is where most users go wrong. The primary key should be selected at this point.
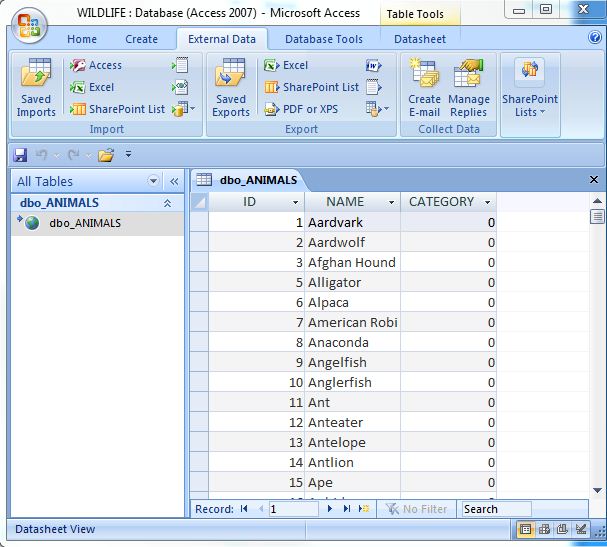
Sixth step is to test the LINKED TABLE by right clicking and selecting open.
As you can see, the task of creating a LINKED TABLE in MS ACCESS is very easy. The main pitfall of most users is not selecting the primary key. This can lead to FULL TABLE scans in the worst case scenerio.
Next time, I will demonstrate how a LOGON TRIGGER can preventing unwanted applications, such as MS Access, from connecting to the server.
